A Complete Guide To Drying And Curing Cannabis
How Do You Dry and Cure Cannabis Plants? from CannabisNet on Vimeo.
Now that your cannabis buds are ready for harvesting, it doesn’t mean that you can already smoke the stuff. Buds need to be cured properly before you can use them.
The Science Behind Why You Need To Dry And Cure Your Buds After Harvest
Curing cannabis buds involves carefully drying them in a controlled environment, followed by keeping them in a sealed glass jar over a few weeks so that the cannabis plant can undergo natural processes in order for it to reach optimum quality and ensure that you’re getting as much cannabinoids, terpenes, and overall potency out of them. Curing is also critical to reduce or eliminate the harsh taste of cannabis. Even if your plants come from amazing genetics and you’ve carefully grown them, curing is still a necessary step that can take your bud from cheap to top-shelf quality.
Proper drying and curing cannabis helps to:
Improve overall quality of your cannabis; cured buds will reduce paranoia or anxiety that less-carefully cured cannabis gives
Decrease chances of bacteria and mold
Break chlorophyll down which results in a smoother taste
Gets rid of harsh qualities that causes some varieties of cannabis to give you a headache or cough
Increases potency
The point of a proper cure is to change the overall effect of cannabis. During the curing process, something happens that changes the cannabinoid and terpene profile that makes you feel better while delivering more health benefits.
How To Dry And Cure Your Cannabis
The process of curing starts the minute you cut your plant. To get the most out of the curing process, it’s important to understand how to dry your cannabis buds. A critical phase of the curing process is during the first few days when you start to dry your bud. At this time, the objective is to let your bud slow dry, which takes anywhere from 3 to 7 days while ensuring that your cannabis is protected from bacteria and molds.
It’s common practice among growers to trim the cannabis buds then hang them upside down to dry. You’ll know that you’re ready to go once the outside of the buds are dry and the small stems end up snapping when you try to bend them. Keep in mind that a slow drying process is always recommended in order to get the most out of your cannabis plants.
Note: Don’t attempt to speed dry your buds by using a dehydrator, oven, or microwave because you’ll lose so many of the important benefits of curing. What’s even worse is that buds that have been speed-dried will usually make you feel paranoid or give you headaches. They also taste and smell really bad!
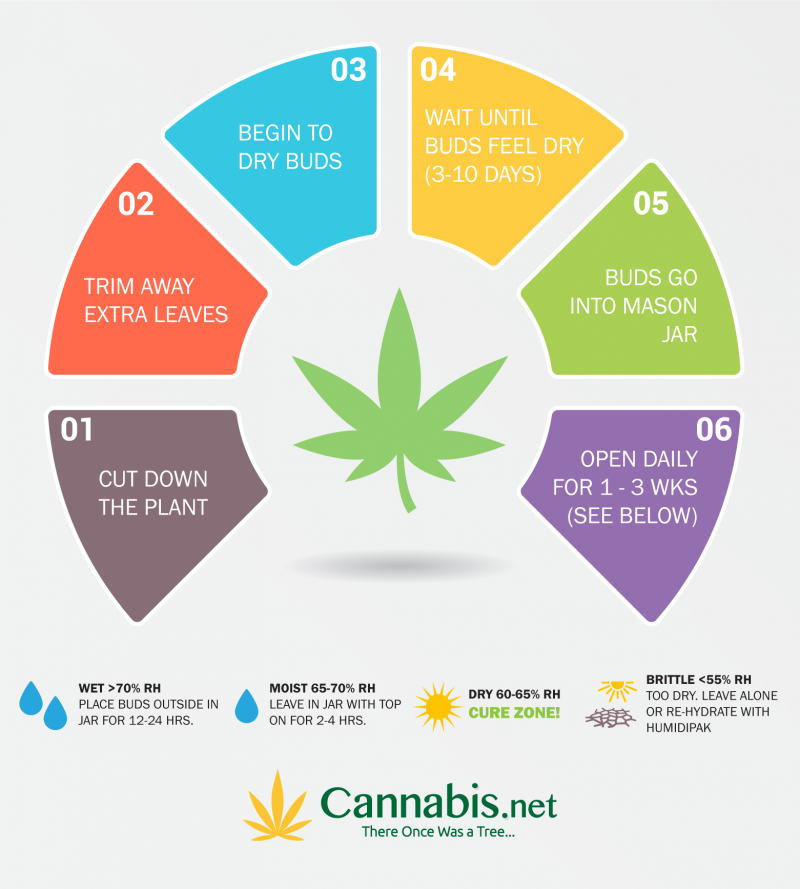
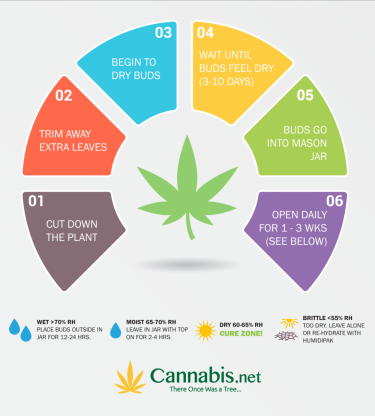
These are the steps involved:
Cut down your cannabis plant, one branch at a time. There are many ways you can go about cutting down your plant; some growers prefer to cut it at the base then hang the entire plant upside down to dry. However, cutting branches down one at a time is the most effective way to go about it.
Trim the extra fan leaves: Do this step carefully so that all the large fan leaves are trimmed off, although some growers also prefer to trim the tiny leaves the grow on the bud itself. Wear disposable gloves while trimming to prevent sticky resin from getting on your hands. This step ensures a better appearance of the bud while giving you a smoother smoke. Consuming excess leafy matter in your smoke will give you a harsh experience. The number or amount of leaves that you trim off mostly varies based on your own personal preference, but if you live in a dry area it’s wise to leave some leaves on. On the other hand, if you live in a humid area, it’s best to trim off as much as you can to speed up the drying process while preventing mold. But if it’s VERY humid where you live, you may want to consider removing the bud off the branches as you dry.
Here’s a guide for trimming based on relative humidity (RH) levels:
Dry (< 30% RH): Leave more leaves on the cannabis plant while trimming to slow down the drying process. The more plant matter you leave, the lower the buds will dry. One way to do this effectively is by trimming the buds but leaving some extra fan leaves on, or avoid trimming completely until you’re done drying.
Average humidity: If you live in an area where you don’t even really notice the humidity, it’s likely that the RH levels are ideal for hanging the cannabis plant upside down to dry.
Humid (> 60% RH): If you live in a very humid place, it’s recommended to separate the bud from the branches after you’ve trimmed them. Next, place them on a drying rack or a mesh to aid in the drying process even during high humidity without having to deal with mold issues.
Once you’re done trimming, save some resin-covered leaves that you’ve cut off. Although these can’t be smoked, they’re the perfect material to use for making cannabis butter and extracts after they’ve dried.
Begin to dry buds: Drying your cannabis buds is the first and most important step of the curing process. The optimum drying environment should be around 50% humidity and around 70°F. Some tools you can use to adjust your environment include:
Air conditioner: cools the air, reduces humidity
Evaporate cooler: cools air, increases humidity
Dehumidifier: heats air, reduces humidity
Humidifier: heats air, increases humidity
Heater: heats air, typically reduces humidity
Keep an eye on the temperature as you cure your buds. Even if your temperature is mildly hot, such as 85°F, can result in the burning off of super valuable terpenes and even some cannabinoids. Proper curing is halfway to ensuring you get the best bud possible.
Cannabis buds can be dried by hanging them upside down using anything from strings to clothes hangers. The entire plant can be hung upside down if you prefer. There are other ways of drying the buds too; some growers like to put freshly harvested buds on a drying rack, which is effective in drying them quicker compared to other method since the stems, which contain some water, are separated from the buds. A drying rack is also recommended if you live in a humid area where mold tends to be an issue, but it’s also ideal if you are drying a large amount of buds but only have a small area to work with, and if you have large colas or buds that may get moldy. Leave as little or as much stem as you’d like, but keep in mind that the more stems there are, the longer it will take to dry.
Other methods of drying also include placing them in paper bags, laying them on cardboard, in a closet, or in a grow tent. Laying bud on cardboard will result in wet spots, which will also leave a print on the side of the buds that touch the surface. Cardboard drying is ideal if you live in a humid environment since it pulls the water from the buds. If you find that the bud creates wet spots on the cardboard, rotate them every 4-5 hours so that they have a chance of drying out evenly. This is a minor nuisance that using a drying rack or hanging eliminates.
If you live in a very humid place or the buds start to get soggy or wet, you should consider using a small fan to contribute to circulation and air flow to prevent the buds from getting too soaked or worse – getting mold. But when you use a fan, never point it directly toward the bud; just point it to a wall nearby. A fan should only be used as a last resort since it can overdry buds instantly.
The most important thing to keep in mind when drying is to do it slowly, so that you can check it regularly and make adjustments if needed. This is something you can’t easily do if you hide them in a hard-to-get-to area like the back of a closet.
Continue drying the buds until their outsides are dry to the touch and small stems snap off when you bend: This process takes 3 to 7 days normally, but if they dry in less than 3 to 4 days it may mean that your buds dried too fast, but that’s fine – apply your learnings for the next time you dry and cure cannabis. Buds that have dried too fast can still benefit from curing although it may take longer for them to be fully cured.
Once the buds have completed the drying process, which you can easily tell when once you can snap off buds with your fingers without having to leave strings of plants behind. If your plant is “stringy”, this means that there is still a lot of moisture inside. Even if the buds feel too dry, provided the stems are still bendy this means that there is still too much moisture inside which can end up outside the buds when you cure them. This is the ideal time to pull the buds down and place them in a jar.
In drying methods that remove the buds from the stems, it’s important to jar the buds immediately when the outsides are dry to touch; right before the buds have dried completely since there will no longer be stems to accumulate water. When the outside of the buds are dry to the touch, this will reduce the chances of any mold growing, since it tends to grow outside when buds are damp.
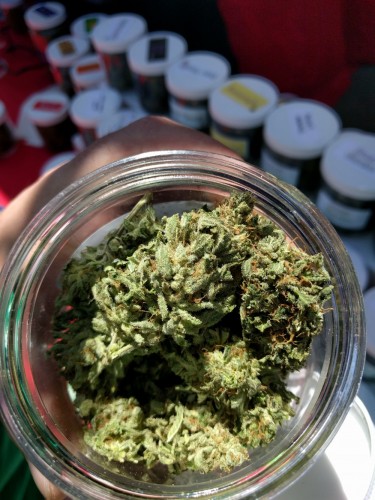
Time to jar the buds: During this step, you will want to keep the buds in a controlled environment where the humidity is stable between 50-65% and the buds are inside a closed container. This is the optimum environment to ensure the cannabis buds have been cured to perfection. If you have taken the buds down once the small stems snap but the large stems still bend, it’s likely that the buds will create the optimum humidity once they’re jarred.
The perfect curing environment in a jar is a room temperature of around 70°F and 60-65% humidity.
Here are some tips to cure the buds as perfectly as possible:
Wide-mouthed glass mason jars make the ideal storage for curing cannabis buds. These can easily be found online, most craft stores, and even supermarkets. Get the 1 quart glass mason jars, which can hold around an ounce of dried cannabis buds each. Quart glass mason jars have been proven the best containers for curing time and again; anything larger may encourage the growth of mold.
Fill 75% of each jar with bud, so that there is some air on top. The buds should be able to move around easily if you shake the jars; but if they stick together then they’re still wet. This can be solved by leaving the lids off for an hour or so until they dry out. But if the buds end up sticking in clumps when you shake the jar, they have too much moisture and need to be dried even more. Cannabis buds should never sit in jars if they are even mildly moist on the outside. They should never stick together. If you detect the odor of ammonia, this means that the buds are still too wet and it’s highly likely that bacteria is already forming.
If you find moist or damp buds, these should not be stored in jars just yet. These buds should dry slowly until they are dry on the outside BEFORE you jar them. Otherwise, leave the jars open until the buds are dry.
Keep the jar open daily for 1-3 weeks. This is important to help you inspect and air out the buds, especially during the first few days when it helps to check them even thrice a day to detect problems like mold and bacteria from excess moisture, then you get to nip it at the bud. Check on the buds every 24 hours at the very least, and open the jars at least once a day because fresh air is critical for the curing process.
If you detect the odor of ammonia, or if the buds feel moist to the touch, they need to air out more before you close the jars. If it starts to smell just like how cannabis should, then you know you’re doing the right thing.
The most important thing to keep in mind for a perfect cure is by controlling the humidity in the environment. The ideal relative humidity (RH) should always be between 60-65%, which creates the suitable conditions for producing just the right amount of moisture and helps you cure the fastest and most effectively. You may also want to consider investing in a hygrometer which helps you get an accurate reading of humidity levels.
Here’s what you should look out for with humidity requirements:
If the buds feel wet (<70% RH): put the buds outside the jar for 12-24 hours
If the buds feel moist (65-70% RH): leave the buds in the jar but keep the top off for 2-4 hours
If the buds feel dry (60-65% RH): PERFECT CURE ZONE
If the buds feel brittle (<55% RH): the buds are too dry, and you’ll need to leave them alone or re-hydrate using a Humidipak.
But if you followed all the steps in this article, it’s unlikely that your buds won’t be brittle
Long term storage: Once the buds have been consistently in the perfect cure zone for several weeks now, you can start to open the jars once a month. Continue curing the buds for up to 6 months, after which any more curing won’t do much for your buds. After 6 months this is when you can begin preparing the buds for long term storage so that you can ensure maximum potency for as long as possible.
For long term storage, or keeping your buds potent for months at a time, use air-tight containers such as the wide-mouthed mason jars, then keep them in a cool, dark place. For prolonged storage over 6 months, it’s best to consider vacuum sealing your buds, or storing them in your freezer using tightly packed mason glass jars.
OTHER STORIES YOU MAY ENJOY...

DON'T FORGET TO BURP YOUR CANNABIS IN CURING, CLICK HERE.
OR..
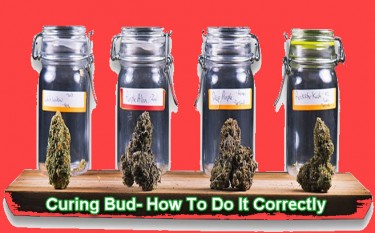
CURING BUD, HOW TO DO IT RIGHT, READ THIS..
OR..
HOW CURING AFFECTS CANNABIS AROMA AND SMELL, READ THIS!
OR..
THE STINK OF THE JOB - HOW DRYING AND CURING CANNABIS WORKS!