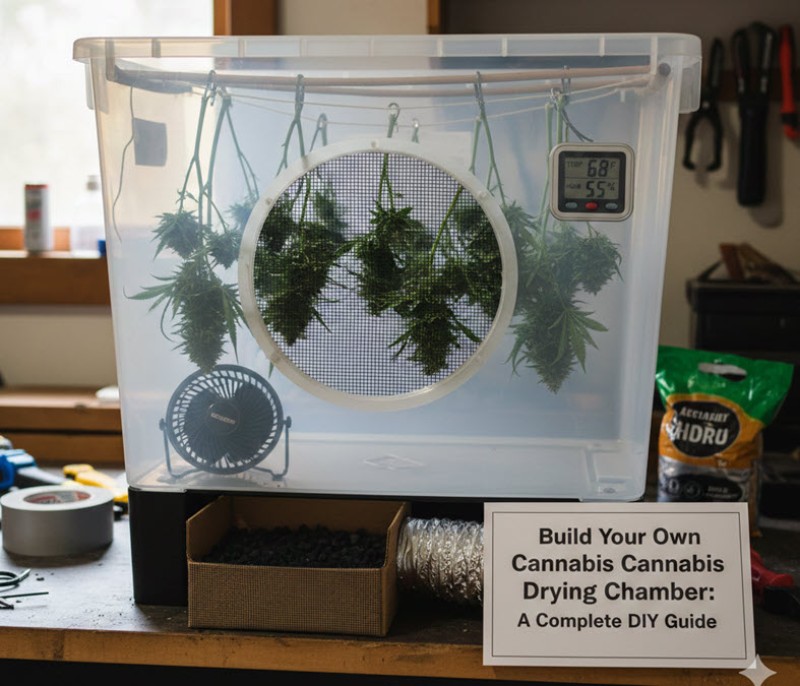

Build Your Own Cannabis Drying Chamber: A Complete DIY Guide
Drying cannabis properly is one of the most critical steps in cultivation, and getting it wrong can ruin months of hard work. Too fast and your buds lose terpenes and potency. Too slow and you risk mold. The sweet spot? A controlled environment maintaining 60°F and 60% humidity—conditions that are nearly impossible to achieve consistently without specialized equipment.
Enter the DIY cannabis drying chamber, a brilliant build originally shared by Reddit user TheBeardedWizrd. This setup uses a thermoelectric wine cooler to create the perfect drying environment, consistently producing flavorful, properly cured cannabis in about 10 days. Better yet, it costs a fraction of commercial drying units and can be built in an afternoon with basic tools.
I'm going to walk you through this build step-by-step, making it accessible even if you're not particularly handy. By the end, you'll have a professional-grade drying chamber that would cost thousands to buy commercially.
Full credit goes to TheBeardedWizrd for developing and sharing this ingenious build with the community.
Why This Build Works
Before we dive into construction, let's understand why this specific design is so effective.
Thermoelectric vs. Compressor Cooling: Standard refrigerators use compressor-based cooling, which cycles on and off, creating temperature and humidity fluctuations that are terrible for drying cannabis. Thermoelectric wine coolers maintain steady temperatures without these swings, providing the consistent environment cannabis needs for proper drying.
Humidity Control: The integrated dehumidifier allows precise humidity management, preventing both mold (from too much moisture) and over-drying (which destroys terpenes and creates harsh smoke).
Temperature Stability: The wine cooler maintains the ideal 60°F temperature that preserves terpenes while preventing mold growth.
Versatility: This setup works equally well for drying flower and for drying sieved bubble hash, making it valuable for various cannabis preparation methods.
Materials List
Essential Components
-
Thermoelectric Wine Cooler
-
Must be thermoelectric, not compressor-based
-
Size depends on your needs (12-18 bottle capacity works for most home growers)
-
Cost: $80-150 (check Facebook Marketplace, Craigslist, or thrift stores for used units)
-
-
Small Dehumidifier
-
Vivosun or similar compact model
-
Must fit inside wine cooler
-
Cost: $30-50
-
-
AC Infinity Controller 79 Pro (or equivalent)
-
Provides precise temperature and humidity control with outlet capability
-
Must support both temperature and humidity monitoring
-
Cost: $70-100
-
-
Screen Door Mesh
-
Enough to cover all shelves in wine cooler
-
Available at any hardware store
-
Cost: $10-15
-
-
Braided Fishing Line
-
20-30 lb test works well
-
For attaching mesh to shelves
-
Cost: $5-10
-
Tools Required
-
Power Drill with Bit Set
-
You'll need a bit sized to accommodate sensor cable and wires (typically 1/2" to 3/4")
-
-
Soldering Iron and Solder (recommended)
-
Or crimp connectors if you prefer (though soldering is safer and more reliable)
-
-
Wire Strippers
-
Sewing Needle (large enough for fishing line)
-
Screwdriver Set
Additional Supplies
-
Extension Wire
-
18-gauge wire, enough to reach from inside cooler to controller
-
Both red (hot) and black (ground)
-
Cost: $10-15
-
-
Silicone Sealant or Insulation Tape
-
For sealing drilled hole
-
Cost: $5-10
-
-
Zip Ties or Mounting Tape
-
For securing sensor and organizing wires
-
Cost: $5
-
-
Electrical Tape
-
For insulating connections
-
Cost: $3-5
-
Total Estimated Cost: $250-350 (significantly less if you find a used wine cooler)
Step-by-Step Build Instructions
Step 1: Prepare Your Workspace
Clear a well-lit area where you can work on the wine cooler. Have all materials and tools readily accessible. Unplug the wine cooler and remove all shelves and internal components temporarily.
Safety First: Work in a well-ventilated area, especially when soldering. Have a fire extinguisher nearby when working with electrical components.
Step 2: Plan Your Hole Placement
Before drilling, carefully plan where to drill your access hole. You need to accommodate:
-
Temperature/humidity sensor cable
-
Extended dehumidifier power wires
Recommended Location: Rear of wine cooler, approximately center height, avoiding any visible cooling elements or structural components.
Pro Tip: Hold the sensor and wires against the back of the cooler from the inside to visualize the best placement before drilling.
Step 3: Drill the Access Hole
-
Mark your drill point clearly with a marker
-
Start with a small pilot hole (1/8" bit)
-
Gradually increase bit size until you reach your final size (typically 1/2" to 3/4")
-
Drill slowly to avoid cracking plastic or damaging components
-
Clean up any plastic shavings or burrs around the hole
Important: Drill from inside to outside to minimize visible damage to exterior finish.
Step 4: Disassemble the Dehumidifier
-
Unplug the dehumidifier
-
Remove any screws holding the casing together
-
Carefully separate the housing to expose internal electronics
-
Locate the power input wires (typically one red/hot and one black/ground)
-
Take photos before disconnecting anything for reference during reassembly
Note: Some dehumidifiers have more complex wiring. If you're unsure, consult the manual or search for disassembly videos specific to your model.
Step 5: Extend the Dehumidifier Wires
-
Cut the power wires approximately 2 inches from where they enter the housing
-
Strip about 1/2" of insulation from each wire end
-
Cut extension wire to length needed (measure from inside cooler, through hole, to controller location)
-
Strip 1/2" from each end of extension wires
-
Connect dehumidifier wires to extension wires:
-
Soldering Method (recommended):
-
Twist wire ends together
-
Apply solder to create solid connection
-
Cover with heat-shrink tubing or electrical tape
-
-
Crimp Connector Method:
-
Use appropriate size crimp connectors
-
Ensure solid connection (tug test)
-
Cover with electrical tape
-
-
-
Label wires clearly (red = hot, black = ground)
Critical: Ensure all connections are insulated and secure. Poor connections can cause fire hazards.
Step 6: Position Components Inside Cooler
-
Dehumidifier Placement:
-
Place at bottom of cooler or on lowest shelf
-
Ensure it's stable and won't tip during operation
-
Orient so water collection (if applicable) is easily accessible
-
-
Sensor Placement:
-
Mount temperature/humidity sensor at mid-height on rear wall
-
Use mounting tape or zip ties to secure
-
Keep sensor away from direct contact with cooling elements
-
Position where it will get average reading of chamber conditions
-
-
Wire Routing:
-
Thread extension wires and sensor cable through drilled hole
-
Leave enough slack inside for any adjustment needed
-
Keep wires organized and away from moving parts
-
Step 7: Seal the Access Hole
-
Apply silicone sealant around wires where they pass through hole
-
Fill any gaps completely
-
Smooth sealant for clean appearance
-
Allow to cure according to product instructions (typically 24 hours)
Alternative: Use insulation foam or rubber grommets if you prefer a removable solution.
Step 8: Install and Mount the Controller
-
Controller Placement:
-
Mount on exterior of cooler or nearby wall
-
Ensure easy visibility and access for monitoring/adjustments
-
Keep away from moisture sources
-
-
Wiring Connections:
-
Connect temperature/humidity sensor to appropriate controller port
-
Connect dehumidifier extension wires to controller outlet
-
Plug wine cooler directly into wall outlet (constant power)
-
Plug controller into wall outlet
-
-
Secure All Connections:
-
Use zip ties to organize and secure wires
-
Ensure nothing is pinched or stressed
-
Label connections if helpful for future maintenance
-
Step 9: Prepare the Shelves
-
Measure Shelves:
-
Measure each shelf that will be used for drying
-
Add 1-2 inches to measurements for overlap
-
-
Cut Screen Mesh:
-
Cut mesh to measured size
-
Ensure edges are clean (no sharp wire ends)
-
-
Attach Mesh to Shelves:
-
Thread fishing line through sewing needle
-
Starting at one corner, sew mesh to shelf edges using simple over-under pattern
-
Keep tension even to prevent sagging
-
Tie off securely at completion
-
Trim excess fishing line
-
Pro Tip: Create a slight upward bow in the mesh so buds don't sit in a depression where air circulation is reduced.
-
Reinstall Shelves:
-
Place prepared shelves back into wine cooler
-
Ensure they're level and secure
-
Step 10: Configure Controller Settings
Based on TheBeardedWizrd's tested settings for optimal drying:
Temperature Settings:
-
Target Temperature: 60°F
-
Temperature Range: ±2°F (58°F-62°F acceptable)
Humidity Settings:
-
Target Humidity: 60%
-
Humidity Range: ±5% (55%-65% acceptable)
-
Dehumidifier activates when humidity exceeds 65%
Programming the Controller:
-
Follow AC Infinity Controller 79 Pro manual for initial setup
-
Set temperature monitoring (passive - wine cooler maintains this)
-
Set humidity control to activate dehumidifier outlet when above 65%
-
Set alerts for out-of-range conditions (optional but recommended)
-
Test system for 24 hours before adding cannabis
Operating Your Drying Chamber
First Use / System Test
-
Run empty chamber for 24 hours
-
Monitor temperature and humidity stability
-
Verify dehumidifier activates appropriately
-
Check for any condensation issues
-
Ensure no strange odors (new equipment off-gassing is normal initially)
Loading Cannabis for Drying
-
Preparation:
-
Trim cannabis as desired (wet trim or dry trim - personal preference)
-
Remove large fan leaves
-
Cut branches to fit on shelves without overcrowding
-
-
Arrangement:
-
Space buds evenly on mesh shelves
-
Ensure buds don't touch each other
-
Allow air circulation around all surfaces
-
Don't overload - better to run multiple batches
-
-
Initial Settings:
-
Start at 60°F / 60% humidity
-
Monitor closely for first 24 hours
-
Adjust if needed based on bud size and density
-
Monitoring the Dry
Days 1-3:
-
Check twice daily
-
Buds will feel noticeably wet
-
Stems will be very flexible
-
No adjustment needed unless humidity spikes
Days 4-7:
-
Check daily
-
Buds will begin to feel dry on outside
-
Stems still flexible but less so
-
Monitor for any mold (especially on dense buds)
Days 8-10:
-
Check daily
-
Buds should feel dry on outside
-
Smaller stems will snap instead of bend
-
Larger stems still slightly flexible
-
Ready for jarring when small stems snap cleanly
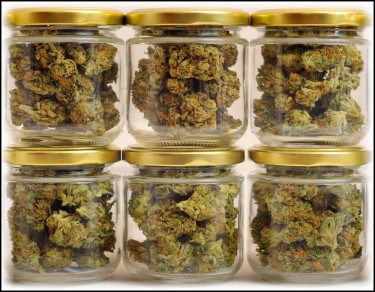
Day 10+ (Into Jars):
-
Buds should stabilize around 60% humidity within jars
-
Begin burping process: Open jars daily for first week
-
Continue burping every few days for 2-4 weeks
-
Final cure can continue for months
Drying Bubble Hash
TheBeardedWizrd notes this chamber also works excellently for drying sieved bubble hash:
-
Preparation:
-
Line cardboard trays with parchment paper
-
Sieve fresh bubble hash onto trays
-
Add a few desiccant packs to chamber
-
-
Drying Protocol:
-
Start at 60% humidity for first day
-
Every 6 hours, drop humidity setting by 5%
-
Sieve hash daily to break up clumps and ensure even drying
-
Continue until completely dry (typically 3-5 days)
-
-
Monitoring:
-
Hash should feel powdery when completely dry
-
Store immediately in airtight containers
-
Keep away from light and heat
-
Maintenance and Troubleshooting
Regular Maintenance
After Each Use:
-
Wipe down all shelves with isopropyl alcohol
-
Empty dehumidifier water collection (if applicable)
-
Clean any plant material from chamber
-
Inspect mesh for damage
Monthly:
-
Check all electrical connections
-
Verify seal around drilled hole
-
Clean sensor with soft, dry cloth
-
Test controller functions
Annually:
-
Deep clean entire chamber
-
Replace mesh if showing wear
-
Inspect wine cooler cooling elements
-
Update controller firmware if available
Common Issues and Solutions
Problem: Humidity won't drop below 70% Solutions:
-
Check that dehumidifier is actually running
-
Verify dehumidifier capacity is appropriate for cooler size
-
Check for air leaks in wine cooler door seal
-
Reduce cannabis load (too much wet plant material)
Problem: Temperature fluctuates Solutions:
-
Verify wine cooler is thermoelectric type
-
Check that cooler isn't in direct sunlight or near heat source
-
Ensure cooler has adequate ventilation around back/sides
-
May need to adjust ambient room temperature
Problem: Buds drying too fast (under 7 days) Solutions:
-
Increase humidity setting slightly (try 65%)
-
Reduce temperature if possible
-
Ensure chamber isn't too empty (affects humidity)
-
Check for air leaks
Problem: Mold developing on buds Solutions:
-
Reduce humidity setting immediately
-
Increase air circulation if possible
-
Remove affected buds immediately
-
Space buds further apart
-
Consider running dehumidifier continuously until situation improves
Problem: Buds losing smell/flavor Solutions:
-
May be drying too fast - increase humidity
-
Check temperature isn't too high
-
Verify proper cure process after drying
-
Ensure chamber is clean (old plant material can affect flavor)
Upgrades and Modifications
Once you have the basic chamber running, consider these upgrades:
Small Circulation Fan:
-
Add a small USB fan for gentle air movement
-
Improves consistency throughout chamber
-
Prevents hot/humid spots
Additional Humidity Control:
-
Add a small humidifier for environments where air is very dry
-
Allows fine-tuning in both directions
UV-C Light:
-
Small UV-C LED for sterilization between batches
-
Helps prevent mold issues
-
Run only when chamber is empty
Smart Home Integration:
-
Many AC Infinity controllers support app integration
-
Monitor remotely
-
Receive alerts
-
Track environmental data over time
Activated Carbon Filter:
-
Small carbon filter to reduce odor
-
Particularly useful in shared living spaces
-
Mount inside or outside chamber
The Sticky Bottom Line
Building your own cannabis drying chamber using TheBeardedWizrd's proven design gives you professional-grade results at a fraction of the cost of commercial units. With an investment of $250-350 and an afternoon of work, you'll have a consistent, reliable system that produces perfectly dried cannabis every time.
The key benefits of this build:
-
Consistency: Maintains ideal 60°F/60% conditions automatically
-
Quality: Preserves terpenes and potency better than ambient drying
-
Versatility: Works for both flower and hash
-
Affordability: Costs less than one commercial drying unit
-
Reliability: Thermoelectric cooling provides steady, long-term performance
Whether you're a home grower looking to improve your harvest quality or someone who's tired of inconsistent drying results, this DIY chamber solves the problem elegantly and affordably.
Massive thanks to TheBeardedWizrd for developing this build and generously sharing it with the community. Check out the original Reddit post for additional details and community discussion.
Now get building, and enjoy properly dried, flavorful cannabis from your harvests. Your future self will thank you every time you crack open a perfectly cured jar.
DRYING AND BURPING YOUR CANNABIS, READ ON...