
Enjoying cannabis comfortably through a glass pipe can be just what the doctor ordered after a long day of stress or while trying to deal with sleep disturbances. The glass pipe all but makes the smoking experience unique and inspirational while giving that all-important euphoric high. Have you ever wondered if it were possible to make glass smoking pipes? If your answer to that question is yes, then you are in the right place. Read on as we take a stepwise approach on how to make a glass pipe for smoking.
The cannabis smoking experience includes both the materials used for smoking, the natural herb itself, and the feeling associated with the inhaled smoke. This means every component of the process is important and this has seen new products like glass pipes and bongs developed to improve the smoking experience as opposed to conventional blunts. While many cannabis users are keen on rolling blunts, new cannabis enthusiasts are more prone to glass smoking pieces. One of the reasons for this is the fact that glass pipes do not affect the taste. Likewise, the different array of glass pipes also makes for proper aesthetics with different designs and shapes available.
If you are a cannabis enthusiast or glassblowing enthusiast, then the knowledge of how to make a glass smoking pipe is one that you must have in your knowledge bank. In no time you can start making glass pipes for yourself and your friends or you can take it a step higher by going commercial with it.
Here is a list of important things that you will need before embarking on the process of making glass smoking pipes.
-
Work gloves
-
Safety goggles
-
Heavy clothing
-
Hair ties
-
Half-inch diameter carbon rod
-
Stationary torch
-
Glass working tongs
-
Two-inch diameter glass tubing
-
Metal awl
It is important to state that safety is very paramount while embarking on this production phase and this is evident in the nature of materials used. It is therefore important to first state that proper safety measures and precautions should be adhered to throughout the production phase.
The making process
Step 1
As stated earlier safety is paramount in glass blowing processes which is why all protective gears must first be one. Start by putting on heavy protective clothing such as jeans, work boots, and thick clothing. Put on appropriate safety goggles and work gloves before operating the torch. It is important to also keep the hair covered to avoid unwanted accidents.
Step 2
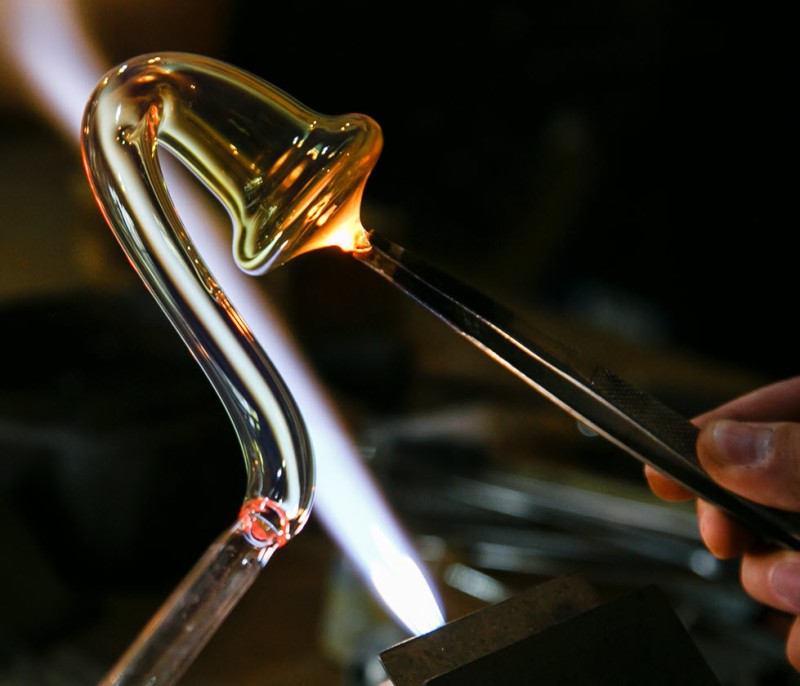
Put on the stationary torch. Take the glass tubing and hold it at both ends with both hands. Slowly bring the glass tubing towards the flame of the stationary torch. Ensure that the middle of the tubing comes in contact with the heat and rotate the glass over the heat for 10 seconds. Initially, ensure that the tubing only comes in contact with the top of the flame and slowly bring the entire tubing into the flame. Rotation of the tubing must be done evenly and quickly.
Step 3
After proper rotation of the glass tubing, it should start to appear red and pliable. Slowly after this, it begins to pull apart. While this happens, it is important to ensure that a glass strand still holds both halves of the glass tubing. After this, the glass tubing should be pulled away from the flame and allowed to cool, while cooling, ensure that you continue to rotate the glass.
Step 4
The stationary torch is to be reduced to a cutting flame. Bring the cooled tubing close to the cutting flame at the strand that attaches both halves. Once inside the flame, the glass begins to become red hot at which point you bend the glass to break it at the center. Remove both ends from the flame and allow it to cool.
Step 5
As done earlier, take half of the glass tubing and hold at both ends over the flame. Hold the glass tubing over the cutting flame where the thin strand touches the thicker tubing. Allow the glass to heat over the flame and break when it turns red hot. Both ends should be allowed to cool afterward.
Step 6
Increase the intensity of the stationary torch from cutting flame back to its full power. Take the original half of the glass tubing at the thin end and the thin strand cut off at the previous step. Heat the end of the thin strand over the flame until it becomes red hot. After it turns red hot, attach the thin strand to the middle of the thick end of the original half of the tubing. Ensure the thin strand remains in place as the tubing cools off.
Step 7
Bring the thin ends of the glass tubing towards the flame. Shape the thick tubing into the desired shape by heating it in the flame and pulling the glass. The dimension of normal glass pipes for smoking falls between 4 to 8 inches and about 1 inch in diameter. Colored filaments can also be melted into the glass tubing pipe to further add color to it. Remove the glass pipe from the heat after working it properly and allow it to cool.
Step 8
Reduce the intensity of the stationary torch to a cutting flame. Hold the glass pipe towards the flame where one thin end strand meets with the end of the pipe that will serve as the bowl pack. This thin strand is to be removed from the pipe when the glass becomes red hot. Afterward, allow the pipe to cool off.
Step 9
Return the intensity of the flaming torch to its initial strength. Bring the pipe to the heat at the bowl pack end and allow the end to remain in the heat for a short period of time. Allow the flame to concentrate at this end then remove the pipe from the heat. Immediately after removing the pipe from the heat at this stage, use a carbon rod to press the bowl pack end to a depth of about an inch. Afterward, allow the pipe to cool off.
Step 10
Decrease the intensity of the flaming torch to a cutting lame. Heat the bowl pack end of the pipe directly over the flame at the bottom till it becomes red hot. Afterward, remove the glass pipe from the heat and use a metal awl to punch a hole through the bottom of the bowl. Afterward, allow the pipe to cool off.
Step 11
This is the final step of the making process which involves heating the pipe where the small holding strand attaches to the pipe. Break the thin strand from the pipe after heating considerably. Afterward, allow the pipe to cool off. With this, you have a glass smoking pipe ready to use after proper craftsmanship.
MAKING GLASS PIPES, READ MORE..
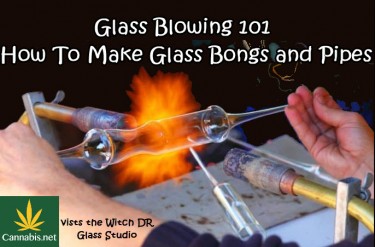
GLASS PIPE BLOWING 101 - HOW TO BLOW GLASS INTO A PIPE!
OR..