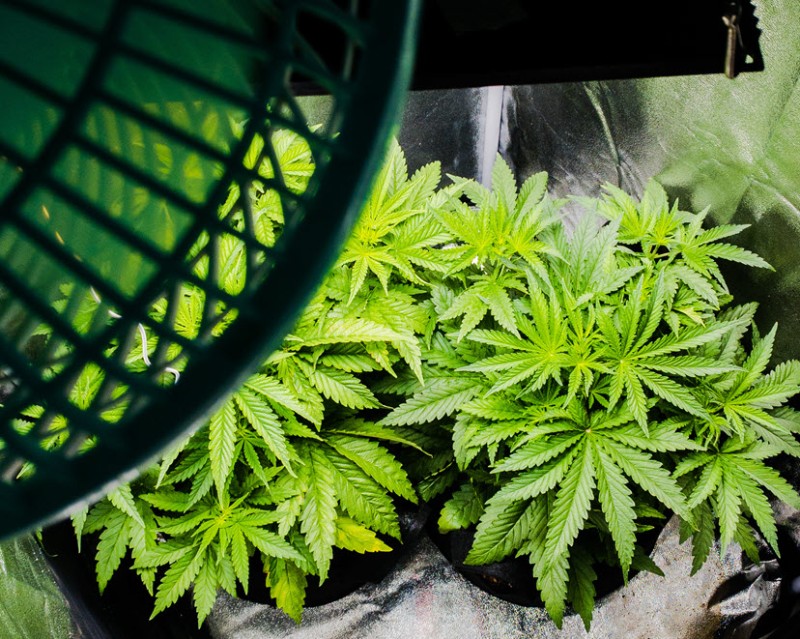
I’ve had an idea for a long time now to integrate a grow box that can both cultivate mushrooms and cannabis simultaneously. Therefore, I decided to utilize AI to come up with a theoretical box that could achieve this process.
The following blog post will focus on this discovery. Sure, I can horde it for myself and build it, then sell it, but I’m also an avid proponent of open-source and despite me being able to innovate and build the box, I would like to give anyone else who has the interest and the economic means to build their own.
So in this post, I’m giving it all away.
Sit back, pack a bowl, let’s build a box that will provide you with infinite weed and infinite mushrooms.
Materials and Costs
Let’s begin with the fist aspect, Materials and costs. In this segment, I have taken into consideration that you want to have a box that can grow at least four plants. This way you can essentially get about a pound or so per harvest. This should provide you with enough weed until the next cycle.
Furthermore, if you have a sprouting chamber at the bottom of the grow box, you can technically keep the harvest coming as one is harvested, the next one can start their cycle.
The mushrooms takes roughly 21 days to fruit, meaning per month you can do a single harvest whereas the cannabis will take roughly 4-6 months depending on when you switch into the flowering cycles.
The mushroom harvests will be most important during the flowering stage of the weed cycles as the natural byproduct of mushrooms is CO2, which we know will help your plants grow bigger and stronger.
Therefore, you’ll want to plan your cycles accordingly
Nonetheless, here’s a breakdown of the materials I estimate you’ll need and the approximated costs associated with them. If you can find these materials cheaper or go dumpster diving to find similar pieces, you can drop the cost of the production significantly.
-
4x8 Hydro Table: $100 - $200
-
Trellis Netting: $10 - $20
-
Reservoir Tank: $50 - $100
-
Submersible Pump: $30 - $50
-
Drip Irrigation System: $20 - $40
-
Air Stone and Air Pump: $20 - $30
-
Grow Lights: $200 - $500
-
Nutrient Solution: $50 - $100
-
pH and EC Meters: $20 - $50 each
-
CO2 Tank and Regulator: $150 - $300
-
Growing Medium (e.g., Rockwool, Hydroton): $20 - $50
-
Seeds or Clones: $10 - $50
-
Climate Control (Humidifier, Dehumidifier, Heater, AC): $100 - $500
-
Timers and Controllers: $20 - $50
Estimated Total Cost: $800 - $2000
The Build and Setup
Now, let’s take a closer look at the build and set up of this box. This is a general guide and of course, theoretical – however, if you understand the basics of how to assemble this box, you’ll be winning!
In the following section I’m covering the basic steps, without too much detail because I’m not the best builder myself. I’d probably reach out to someone who knows how to do this better than me, however consider that this will also increase costs especially if you pay them. The DIY builder can use this as a base for their own build. So follow these instructions and see how it goes.
-
Hydro Table and Reservoir Setup:
-
Place the 4x8 hydro table on a sturdy stand or frame.
-
Position the reservoir tank underneath the table.
-
Install the submersible pump in the reservoir.
-
-
Drip Irrigation and Trellis Netting:
-
Connect the drip irrigation system to the pump. Arrange the drip lines across the hydro table to ensure even water distribution.
-
Install the trellis netting above the table to support plant growth.
-
-
Air and Water Circulation:
-
Place the air stone in the reservoir and connect it to the air pump. This will oxygenate the water.
-
Set up the water circulation system so that the nutrient solution is recirculated from the reservoir to the plants and back.
-
-
Lighting and CO2 System:
-
Hang the grow lights above the hydro table at the recommended height for your plants. For lights, you’ll probably want to use LED to reduce the heat for the mushroom cultivation that will be on top of the box.
-
Set up the CO2 tank and regulator to enrich the growing area with CO2. Ensure it’s timed with the light cycle. This is an addition, however, if you’re growing mushrooms, it should replace the need for this tank.
-
-
Climate Control:
-
Install necessary climate control devices (humidifier, dehumidifier, heater, AC) to maintain optimal growing conditions (81°F, 55% RH).
-
-
Timers and Controllers:
-
Use timers to automate lighting, irrigation, and CO2 release cycles.
-
Set irrigation to water 26 times a day for 15 seconds each.
-
Solving the Heat Problem
To manage the heat generated by the grow lights and ensure it doesn't interfere with mushroom development, you can implement a few strategies:
-
Insulation and Separation: Create a well-insulated barrier between the mushroom compartment and the cannabis grow area. Use reflective and insulating materials to prevent heat transfer.
-
Ventilation: Install separate ventilation systems for both compartments. Use fans and ducting to remove excess heat from the cannabis grow area and maintain a cool environment in the mushroom compartment.
-
LED Grow Lights: Use high-efficiency LED grow lights that produce less heat compared to traditional HPS or MH lights. Ensure proper spacing between the lights and the plants to further reduce heat buildup.
-
Active Cooling: Implement active cooling systems such as air conditioners or water-cooled lights to manage the temperature in the cannabis grow area.
These elements will be critical in ensuring that you have a good harvest of mushrooms. You’ll also want to run a duct from the fruiting chamber of the mushrooms into the grow box. You can also have another extractor fan that will send the O2 generated by the weed into the fruiting chamber of the mushrooms.
This closed system should allow your mushrooms to grow bigger as well as your weed.
The Sticky Bottom Line
At the end of the day, this is something I’ll probably build over the next year. I’m living in a residential area and have a home office, therefore, having a grow room in the house would be ideal, especially since I don’t want my neighbors to know what I’m doing.
Right now, I’m just preparing myself for it, getting the necessary items to ensure that the system works. When I have it built, I’ll revisit this blog and update it accordingly.
For now, I hope I inspired some of you to think about making this multifunctional growbox and hopefully you can build it as well. If you’d like to collaborate and discuss, shoot a message to my editor who forwards me all these comments and let’s talk!
GROWING WEED AT HOME, READ ON...
HOW TO SET UP A WEED GROW AT HOME FOR $50 OR LESS?


